github AI相關projects整理
因為牽涉語音的 project,有些只支援 English ,也需要紀錄,以免浪費時間。
在windows中使用多個 python環境 :
https://www.linkedin.com/pulse/managing-multiple-python-versions-windows-pyenv-win-abdul-rehman-k2lvc#:~:text=Simply%20use%20the%20command%20to,specified%20Python%20version%20and%20environment.
https://medium.com/@subhrastien/how-to-install-multiple-python-versions-on-a-single-computer-and-use-them-with-vscode-3bc0f0aa5ac7
| URL | description | English Audio Only | windows | |
| https://github.com/OpenTalker/SadTalker | portrait + audio = video | trained by english dataset , but 中文語音也能生成 | yes | |
| https://github.com/yerfor/GeneFace | audio to video/lip sync | 中文可 |
環境 1 :直接在 windows中使用 conda(就可以少跑一個 linux節省資源?) 窮人玩AI
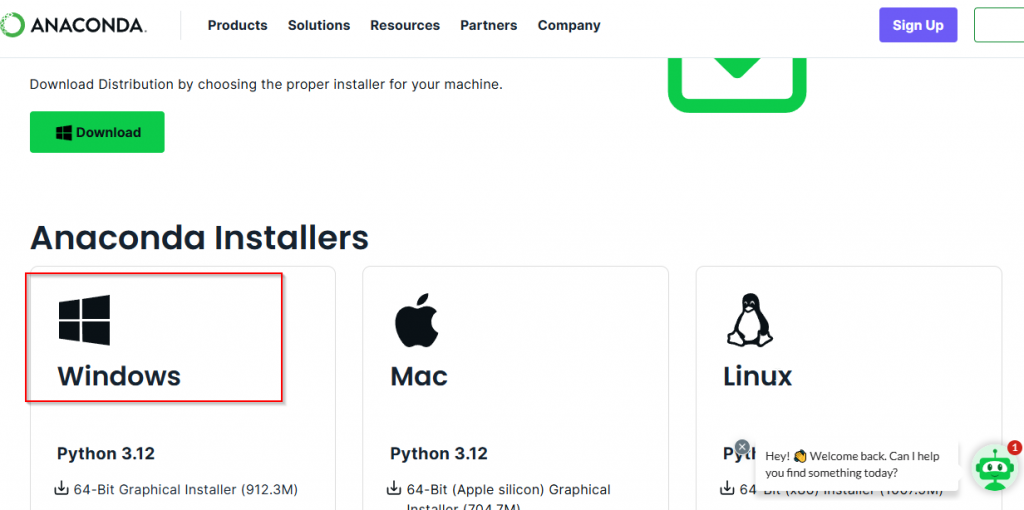
Windows不需要先安裝 python, Anaconda會安裝 python.
前往 Download Anaconda Distribution | Anaconda
or Index of / (anaconda.com) (不用註冊 email)
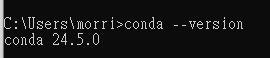
After installation , check if python installed :

環境2 : windows WSL environment (for DRAM shared to GPU to expend VRAM size) 窮人玩AI
前提 : Nvidia 目前在 linux 仍未提供,像是在 windows 裡面的 shared memory 功能 。
according to :CUDA on WSL (nvidia.com)
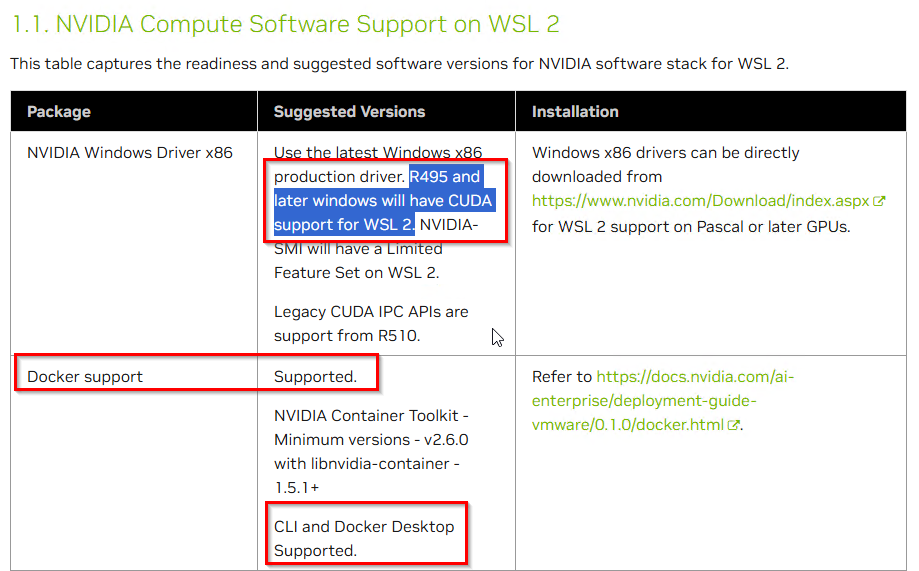
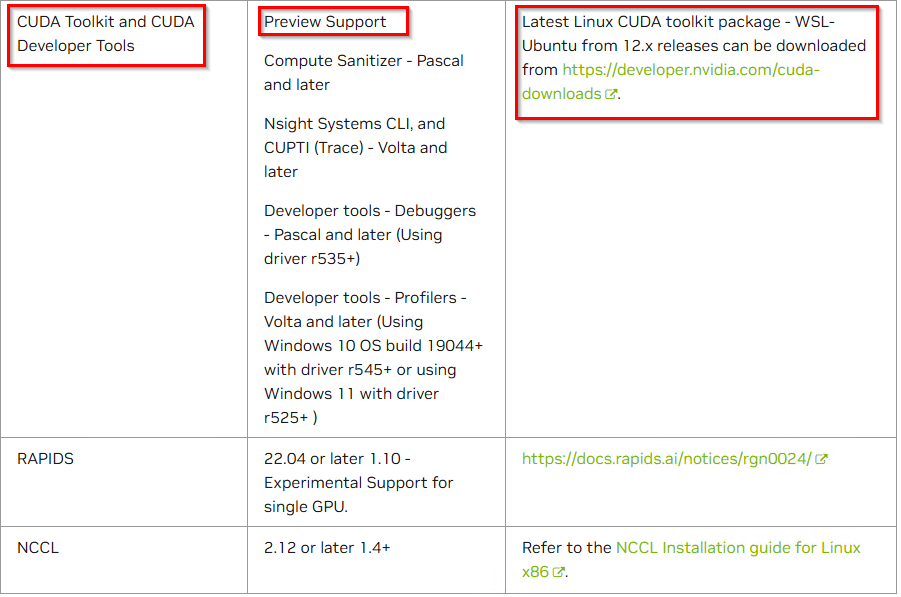
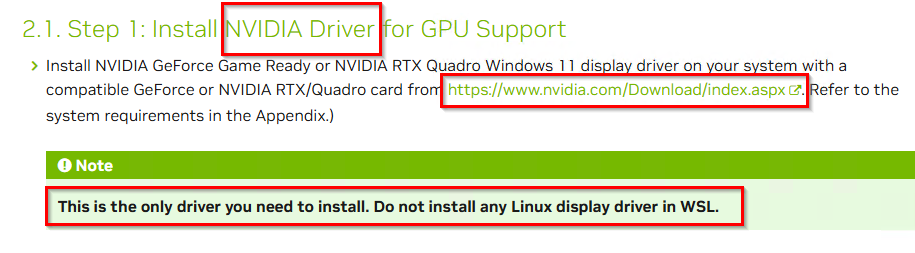
Install driver for windows ONLY ! Don’t install driver in WSL!
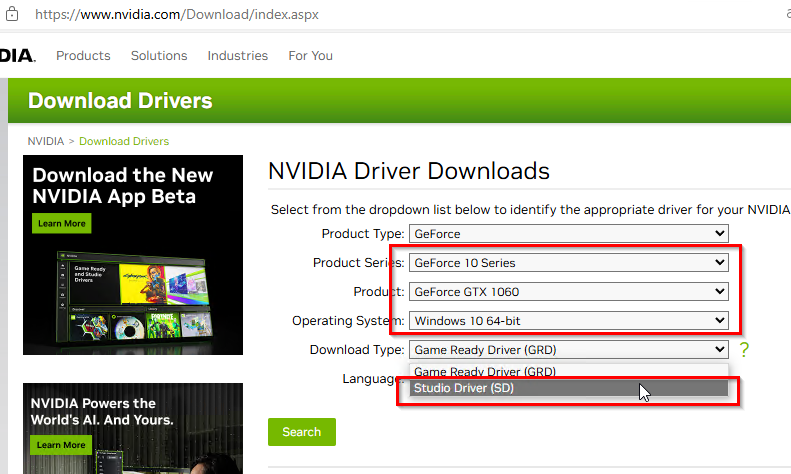
So GTX-1050 Ti, GTX-1060 supported ,and install Nvidia driver for windows only .
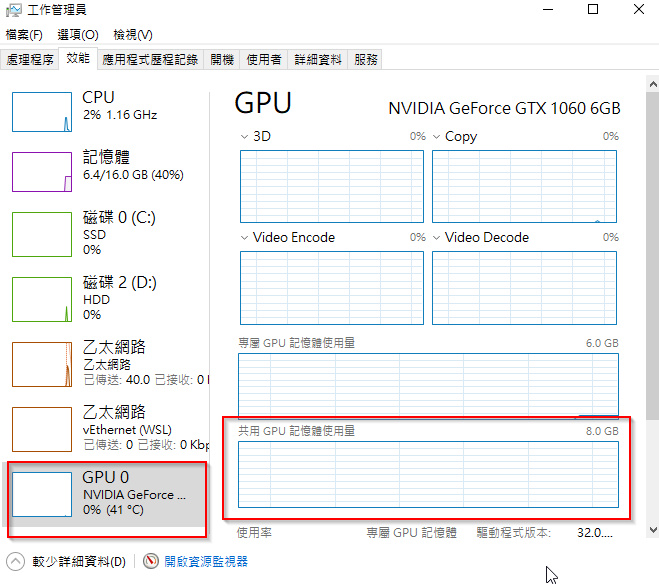
For Windows 10 and 11 and newer operating systems, Microsoft introduced GPU shared memory, which uses 50% of physical memory for uniform addressing by default.
For CUDA, if you use Nvidia driver version 536 and newer versions under the above operating systems, then you can indeed use shared memory when you are low on memory. (This also applies to WSL). This behavior is not demoted to the CPU, but it can still significantly slow things down. This is because the actual operation passes through the PCIe bus and accesses the DDR memory.
這對於 顯示卡記憶體不多的窮人來說,是一個很好的 solution ! 雖然 VRAM不夠用時,調用到DRAM效能會變差,但至少可以執行!對於要求必須 —gpu all 的專案來說, 至少可以執行,對於開發、學習、DEMO 等用途來說,此 solution 是非常好的。
WSL
If you previously install docker-desktop already , then you are WSL already.
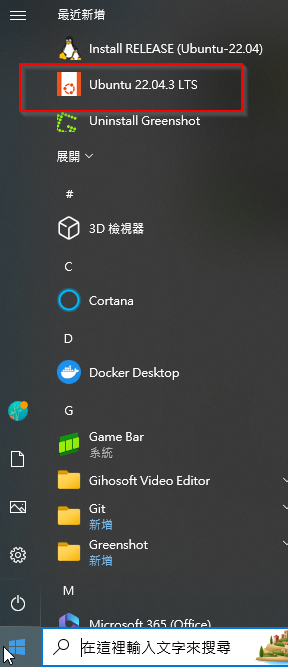
Open Microsoft Store , search “Ubuntu22.04” , must be for WSL , install it . Now you got a Ubuntu22.04 in your Windows 10 , you can find it on Start Menu .
The first time you click it , it will run a installing process (only few seconds) , ask you a user/pass (But I don’t know what’s that for, because you find when you get into the Ubuntu , you are root ).
Close terminal then open terminal again , run “wsl -l” you can see your ubuntu there .
next time you want to use your ubuntu , just click your ubuntu on Start Menu .
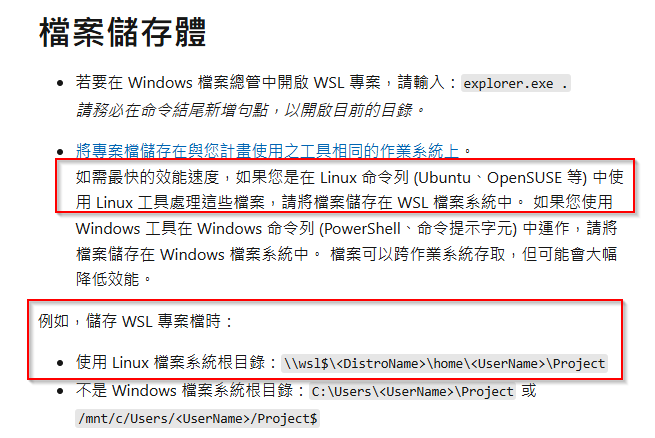
如果你的專案未來要在 WSL/ linux 下面執行,相關檔案要存在 linux 下。
1. Real3DPortrait
https://github.com/yerfor/Real3DPortraitbelow is windows 10 + conda
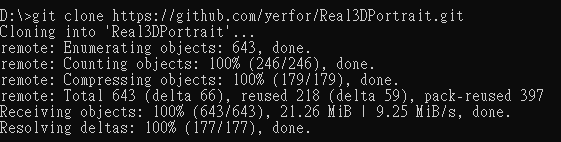
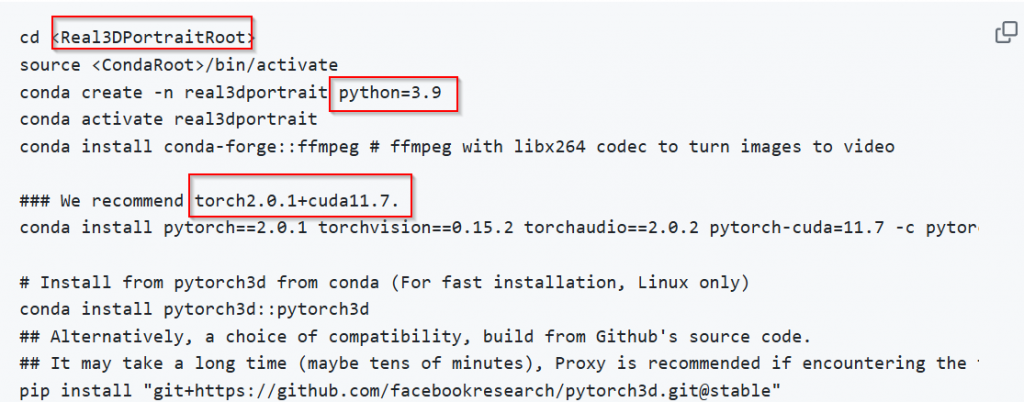
git clone https://github.com/yerfor/Real3DPortrait.git
cd d:\Real3DPortrait
source <CondaRoot>/bin/activate (windows不需要,安裝conda時已經把 conda 路徑都寫入 PATH環境變數了)
D:\Real3DPortrait>conda create -n real3dportrait python=3.9
過程會問要安裝一些packages , 回答 y , enter .
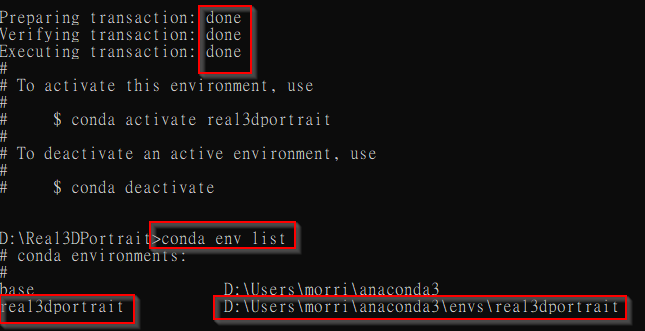
安裝完後,確認 是否 create 成功
D:\Real3DPortrait>conda env list

有 Real3DPortrait 這個 env了, create 成功了。
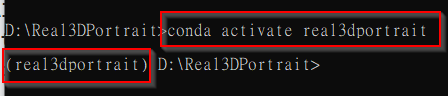
conda activate real3dportrait

注意以下 : (real3dportrait) ,在activate 以後,就進入了一個 conda 的 env ,命令列前面就多了 這個env ,之後的各種安裝 packages動作都在此獨立的env內。
(real3dportrait) D:\Real3DPortrait>conda install conda-forge::ffmpeg
# ffmpeg with libx264 codec to turn images to video安裝pytorch3d
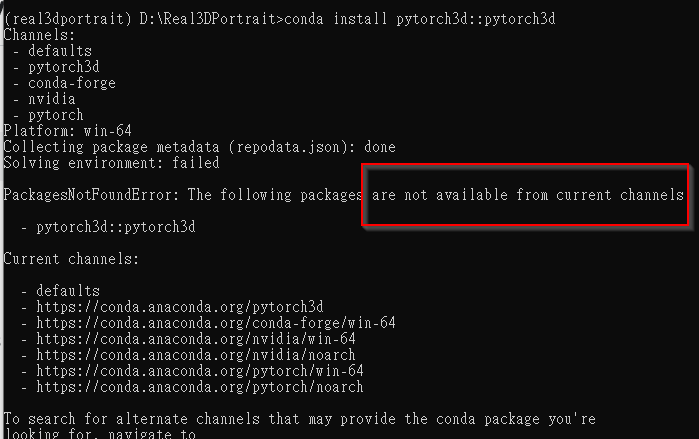
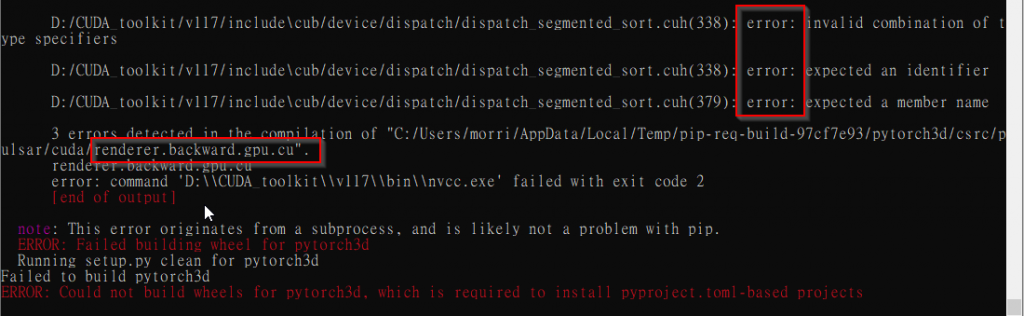
(real3dportrait) D:\Real3DPortrait>conda install pytorch3d::pytorch3d
(Linux Only!! If you run this in wondows you will get following error)
If you wanna install pytorch3d in windows conda , have to install from source :
pip install "git+https://github.com/facebookresearch/pytorch3d.git@stable"

We got 2 errors need to solve . nvcc & g++ ?
First , we need to install nvcc .
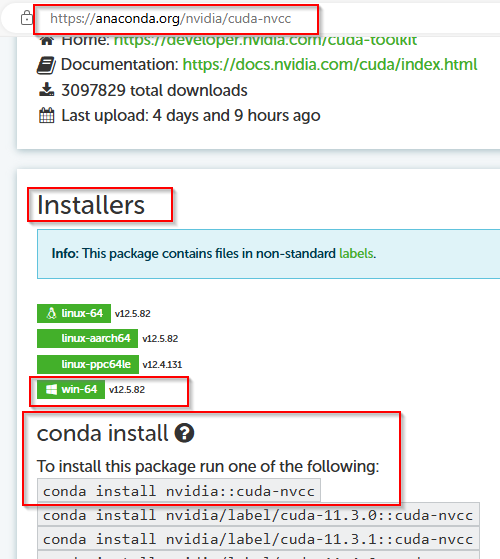
執行 conda install nvidia::conda-nvcc 後 有錯誤
研判是沒有 msvc ,在 windows 10 安裝 visual studio ,再重新安裝一次 nvcc

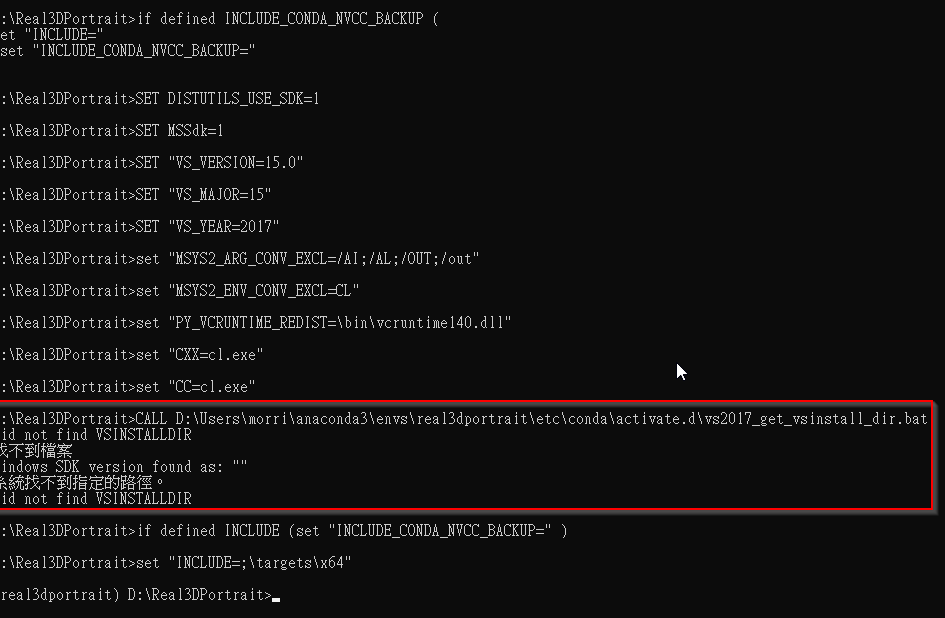
仍有錯,但本次有找到 windows sdk 版本
奇怪了, 既然已經安裝了 msvc 那直接重新安裝 pytirch3d 試試看
這次除了找不到 ninja 以外還多了 找不到 CUB_HOME
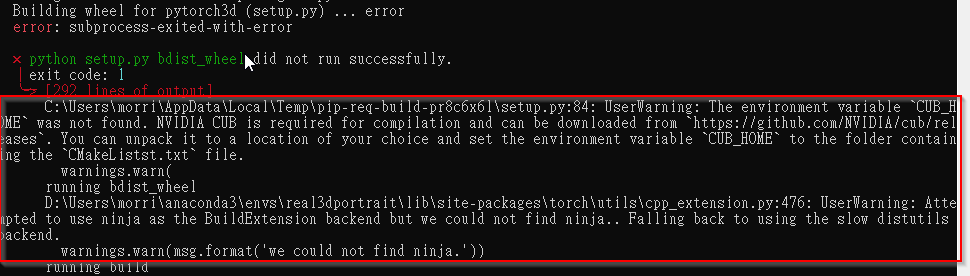

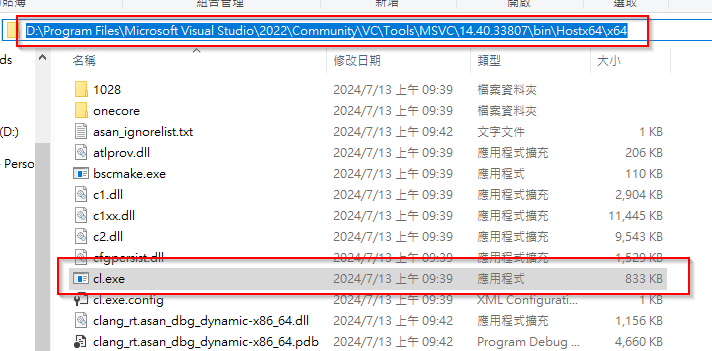
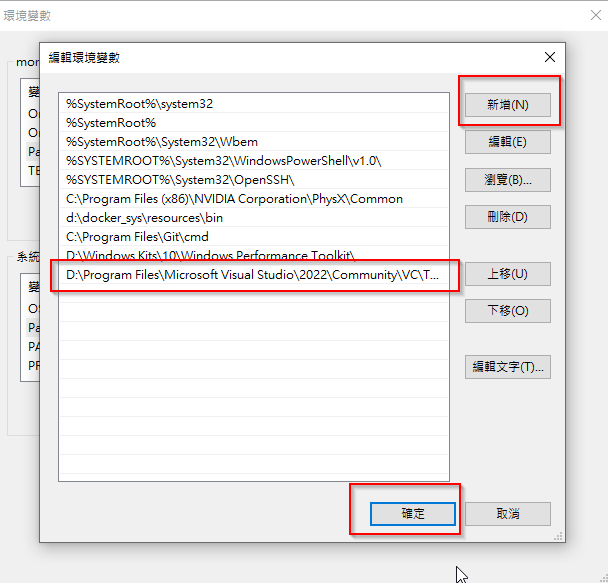
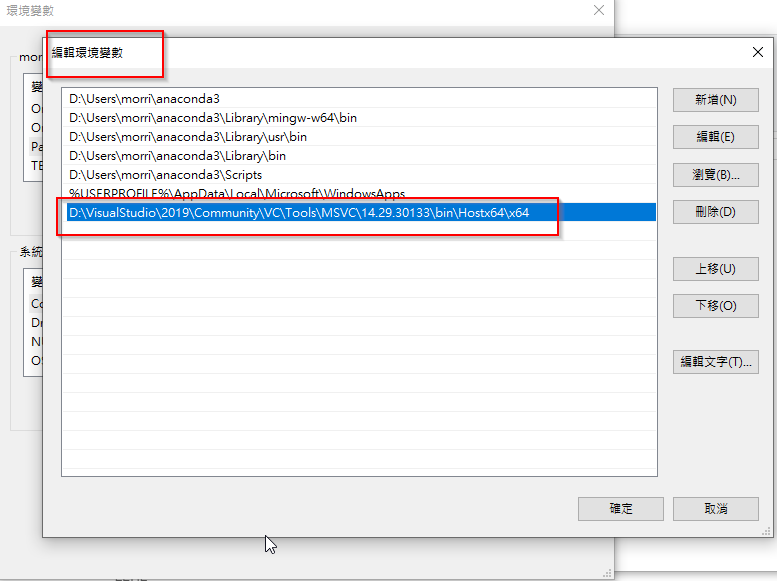
將 cl.exe的路徑,加入path環境變數

打開 D:\Users\morri\anaconda3\envs\real3dportrait\Library\include\cuda_fp16.h
把所有 <nv/target> 改成 所在路徑 <targets/x64/nv/target>

cuda_bp16.h 也有相同問題
使用以下terminal 以admin身分執行

在 專案目錄下,把 pytorch3d clone下來,
cd pytorch3d
python setup.py install

還是一直有錯,這個 pytorch3d 太難裝了,應該是 cuda版本、CUB、VisualStudio等版本不匹配, 決定全部重來 。
vs2022 已經驗證 build pytorch3d 不能成功,改換成 vs2019 。
Visual Studio 2019 Download Free – 16.11.34 | TechSpot
VS安裝完先把 cl.exe 路徑設定到環境變數 :
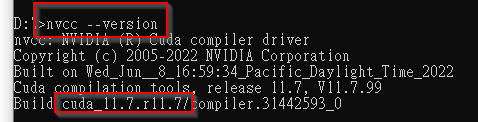
先釐清所有對應的版本
各版本 cuda toolkit :
CUDA Toolkit Archive | NVIDIA Developer
安裝cuda toolkit 11.7.1

安裝程式會自動設定 CUDA_PATH 環境變數
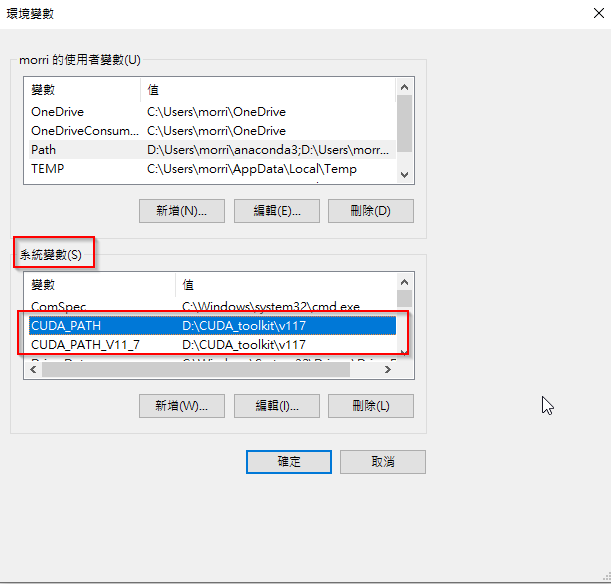
如果之後要多個有需要使用多個 cuda版本,就是在此變更 CUDA_HOME的路徑。
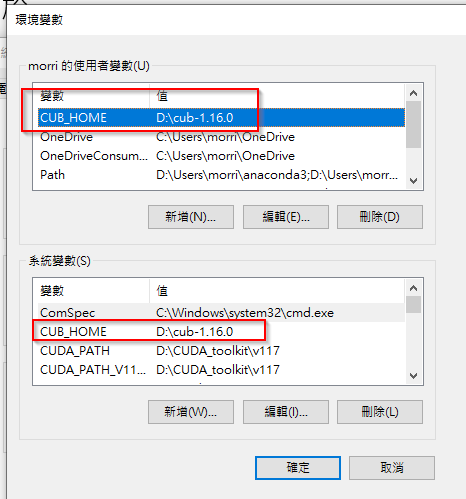
cudatoolkit 11.7.1對應 cub-1.16.0
Tags · NVIDIA/cub · GitHub
下載的 CUB 解壓縮後,設定環境變數 : can be downloaded from https://github.com/NVIDIA/cub/releases. You can unpack it to a location of your choice and set the environment variable CUB_HOME to the folder containing the CMakeListst.txt file
Cuda Nvcc :: Anaconda.org
這需要嗎?
先把 Real3DPortrait clone下來
D:>git clone https://github.com/yerfor/Real3DPortrait.git
開始做 conda 環境
cd Real3DPortrait
D:\Real3DPortrait>conda create -n real3dportrait python=3.9
最難的來了,安裝 pytirch3d
1.先試驗 git安裝
pip install “git+https://github.com/facebookresearch/pytorch3d.git@stable”
失敗了,
2.再嘗試 先clone到 env內再安裝
cd clone pytorce3d ; cd pytorce3d ; python setup.py install
一樣的錯誤

3.改用 visual studio terminal 安裝 ( run as admin)
記得terminal 起來先進conda : conda activate pytorch3d
cd到 env裡面

又有問題

conda環境下 在 terminal設定以下 :
set DISTUTILS_USE_SDK=1 , enter
set MSSdk=1 , enter
conda裡面 再run 一次 python setup.py install
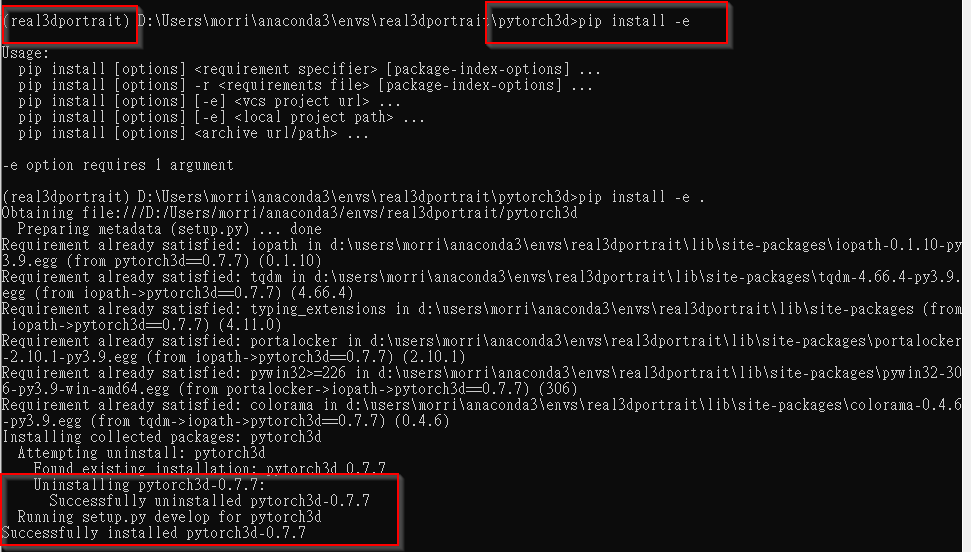
看到以下兩個訊息,就表示成功了(還會再安裝一些 dependencies)

看到以下訊息

就表示 pytorch3d 安裝成功了! 有版本編號 0.7.7
進行 unit test :
python -m unittest discover -v -s tests -t .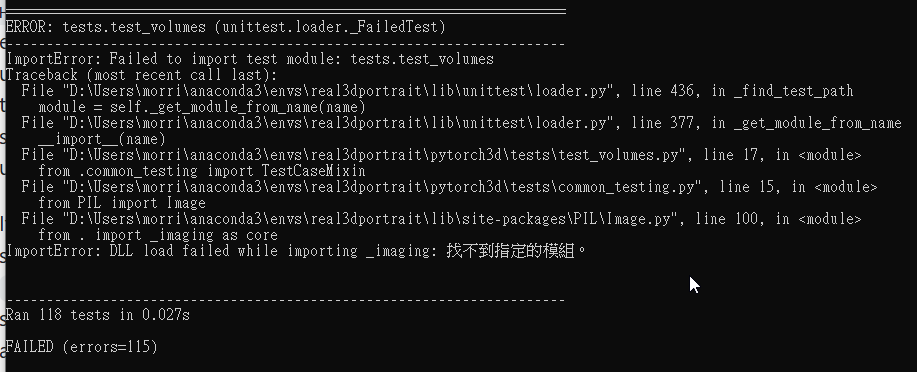
4. 改用 pip install -e .
But , 如果 進入 python (enter)
from pytorch3d.renderer import HeterogeneousRayBundle, PerspectiveCameras, RayBundle
這行指令是執行無誤的,所以 pytorch3d 應該是安裝成功的?
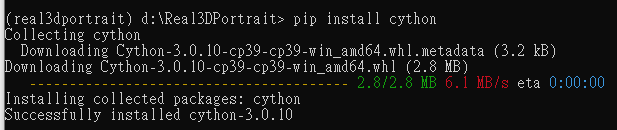
Install MVCC
cd Real3DPortrait
(real3dportrait) d:\Real3DPortrait> pip install cython
pip install openmim==0.3.9
mim install mmcv==2.1.0
# use mim to speed up installation for mmcv
pip install -r docs/prepare_env/requirements.txt -v –use-deprecated=legacy-resolver
Download Pre-trained & Third-Party Models
(real3dportrait) D:\Real3DPortrait>python inference/real3d_infer.py
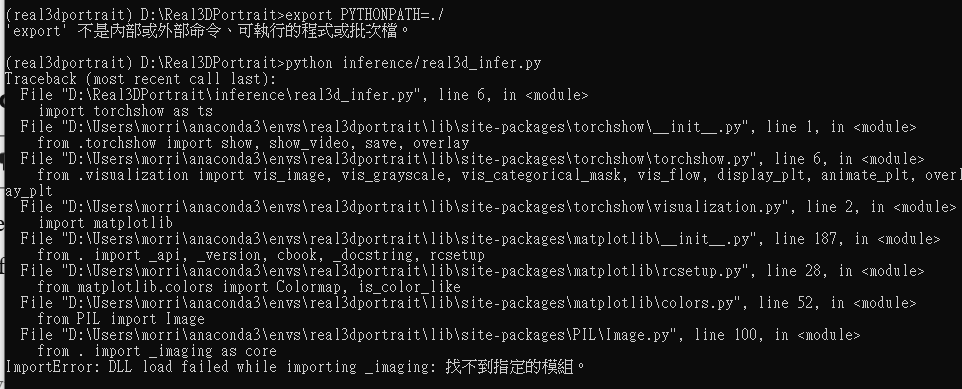
according to this :
python – DLL load failed while importing _imaging: – Stack Overflow
pip install --upgrade Pillowwill fix this !
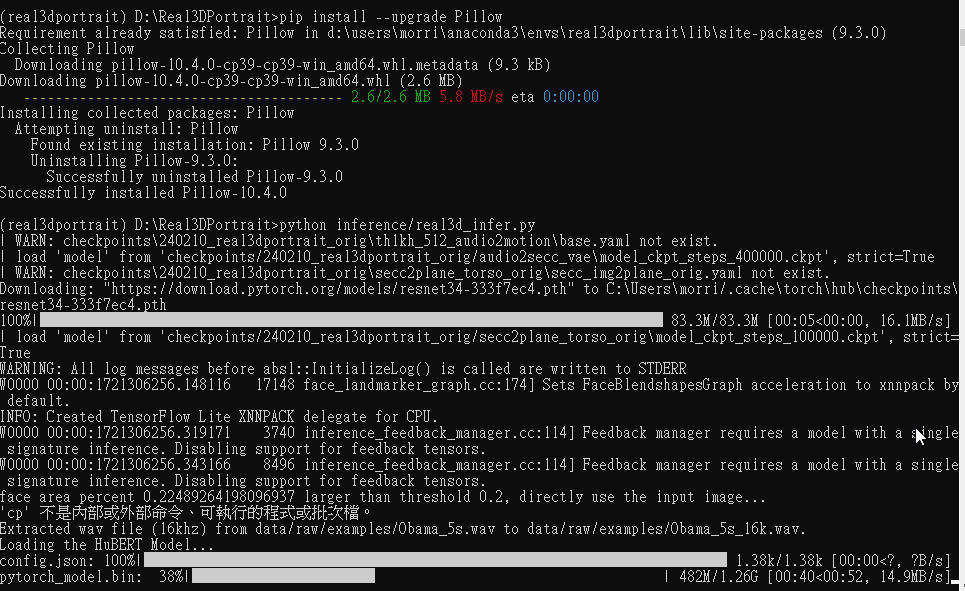
real3dportrait start to run !
But !!!
when tried with example :python inference/real3d_infer.py --src_img data/raw/examples/Macron.png --drv_aud data/raw/examples/Obama_5s.wav
WTF

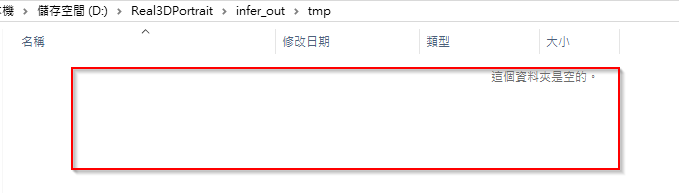
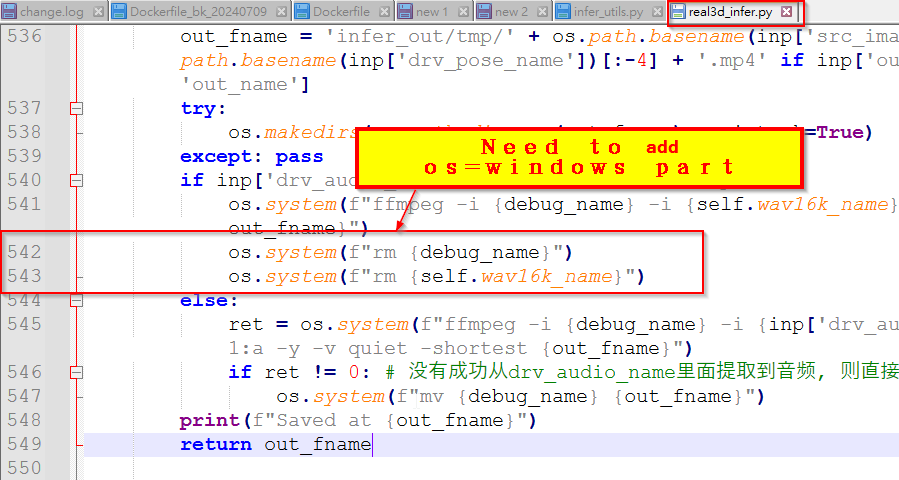
That’s because we are in windows 10 , some code of terminal command not work in windows :
So, add codes for windows in real3d_infer.py
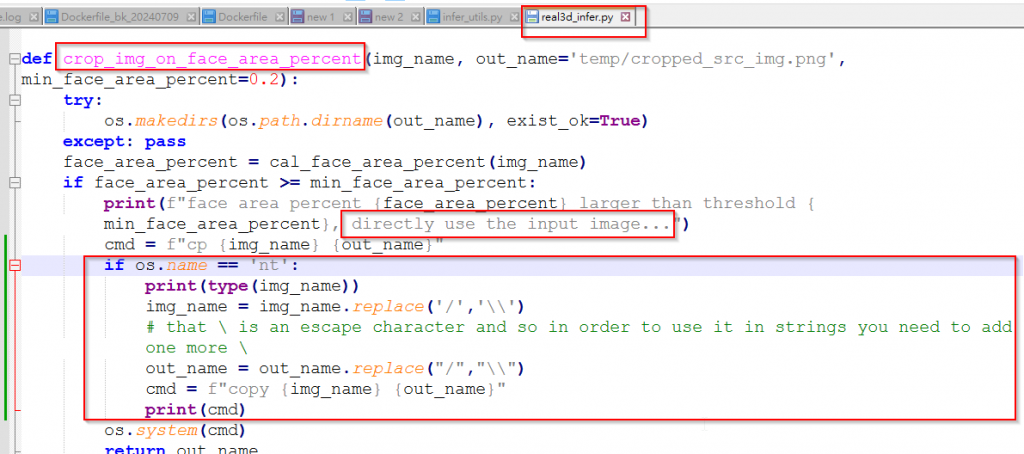
Finally , it works . But still left some linux terminal command need to add windows part :
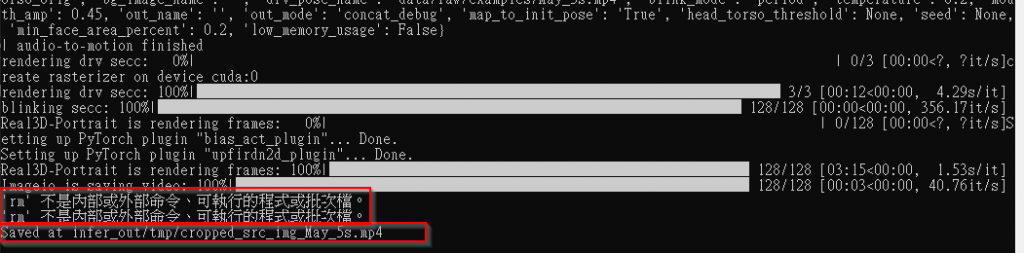
But generated video is not what we expected !
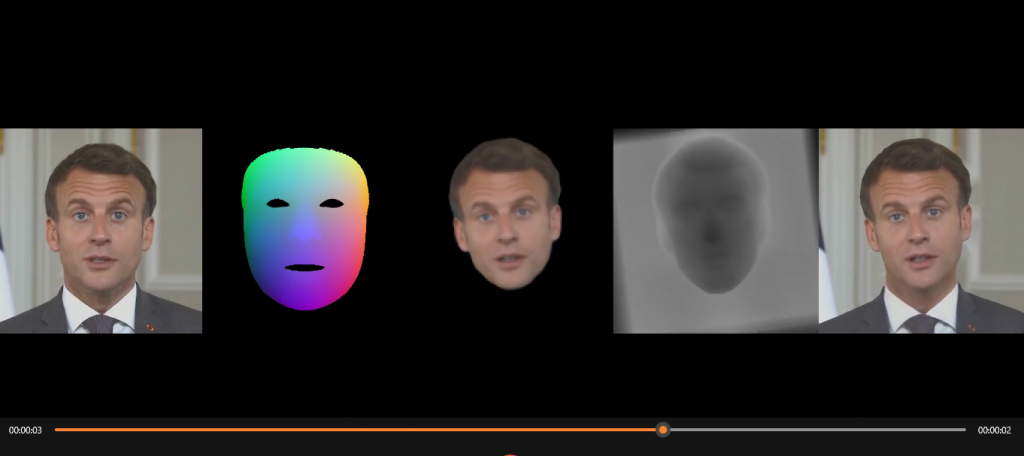
We only need last/rightest part .
OK, that’s because we didn’t assign –out_mode arg (–out_mode final ).
Now change our command to : python inference/real3d_infer.py --out_mode final --src_img data/raw/examples/Macron.png --drv_aud data/raw/examples/Obama_5s.wav

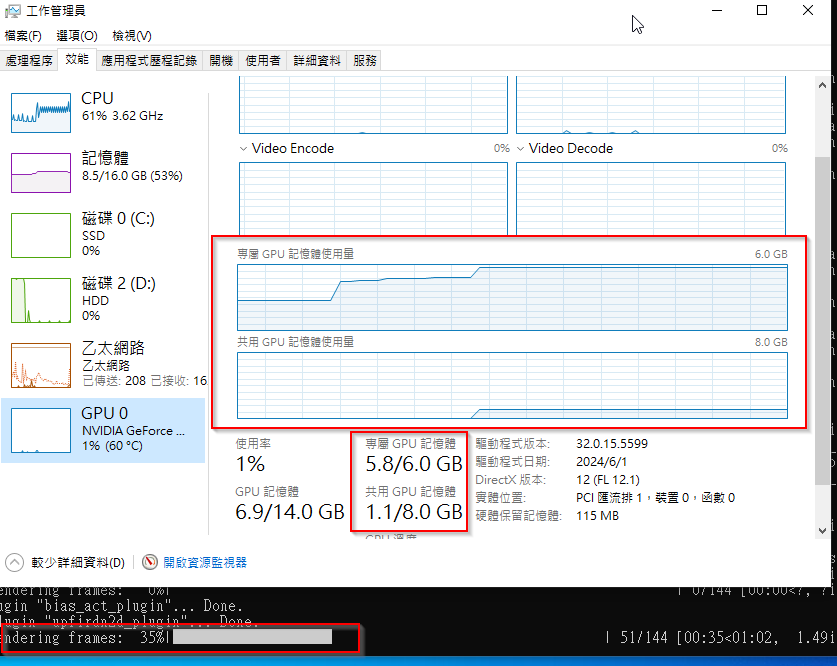
GPU Usage :
real3DPortrait Docker
先使用官方建議安裝步驟 , 寫成Dockerfile
開始build 看看
Trouble shooting
=> ERROR [11/11] RUN pip install -r docs/prepare_env/requirements.txt -v –use-deprecated=legacy=resolver 6.1s
4.901 /usr/bin/bash: /opt/conda/envs/real3dportrait/lib/libtinfo.so.6: no version information available (required by /usr/bin/bash)
4.901 /bin/bash: /opt/conda/envs/real3dportrait/lib/libtinfo.so.6: no version information available (required by /bin/bash)
移除 Conda 環境中的 libtinfo.so.6 軟連結,強制使用系統的 libtinfo.so.6。
RUN rm -f $CONDA_DIR/envs/real3dportrait/lib/libtinfo.so.6
再 build ,變成這個問題 :
49.26 (‘Connection broken: IncompleteRead(17037601 bytes read, 162833605 more expected)’, IncompleteRead(17037601 bytes read, 162833605 more expected))
49.26 (‘Connection broken: IncompleteRead(17037601 bytes read, 162833605 more expected)’, IncompleteRead(17037601 bytes read, 162833605 more expected))
49.26
49.26
49.26 ERROR conda.cli.main_run:execute(127): conda run /bin/bash -c conda install pytorch==2.0.1 torchvision==0.15.2 torchaudio==2.0.2 pytorch-cuda=11.7 -c pytorch -c nvidia -y failed. (See above for error)
ERROR: failed to solve: process “conda run -n real3dportrait /bin/bash -c conda install pytorch==2.0.1 torchvision==0.15.2 torchaudio==2.0.2 pytorch-cuda=11.7 -c pytorch -c nvidia -y” did not complete successfully: exit code: 1
有東西下載不成功?
2. picture + audio(or TTS) => video with lip sync
Try to build a Dockerfile of this project
- FROM ubuntu:22.04
- install nvidia driver for ubuntu
check current nvidia-smi of windows 10 :
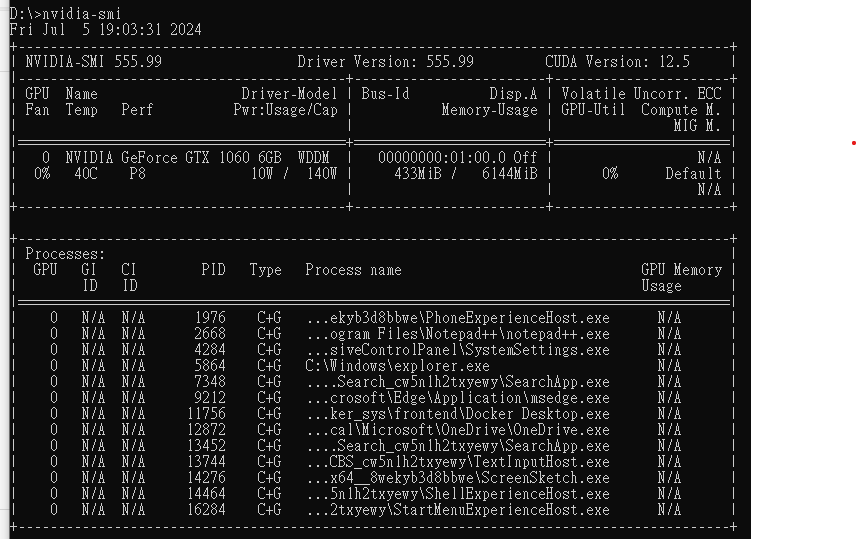
So, this GPU working fine in wondows.
But we are tring to establish environment in docker – Ubuntu22.04 , as project descriped , it need cuda 12.1 , we go to :
CUDA Toolkit Archive | NVIDIA Developer
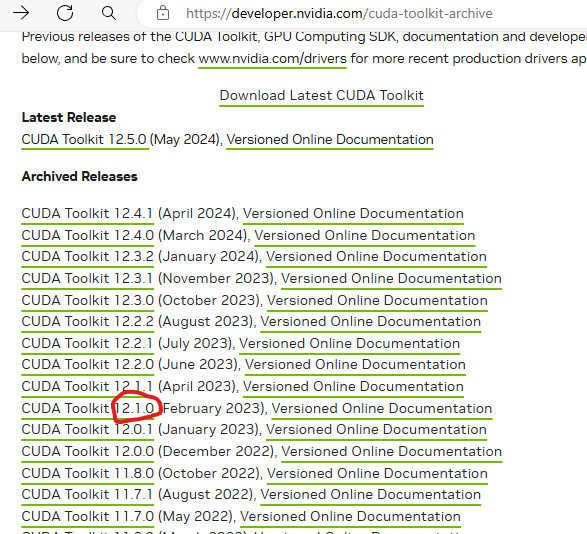
Or maybe you can choose the latest version ?
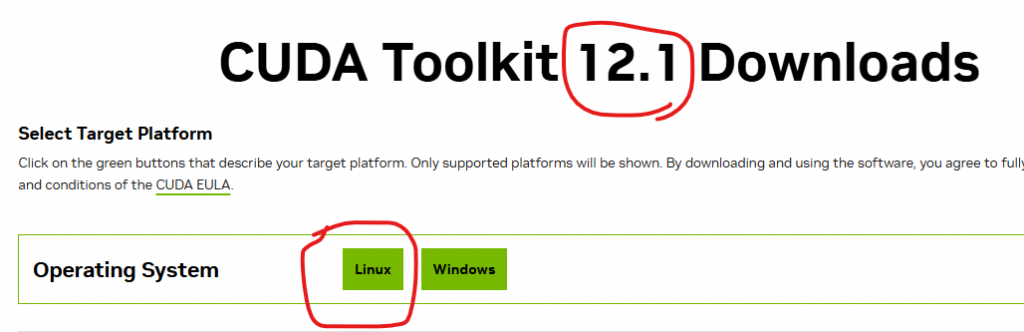
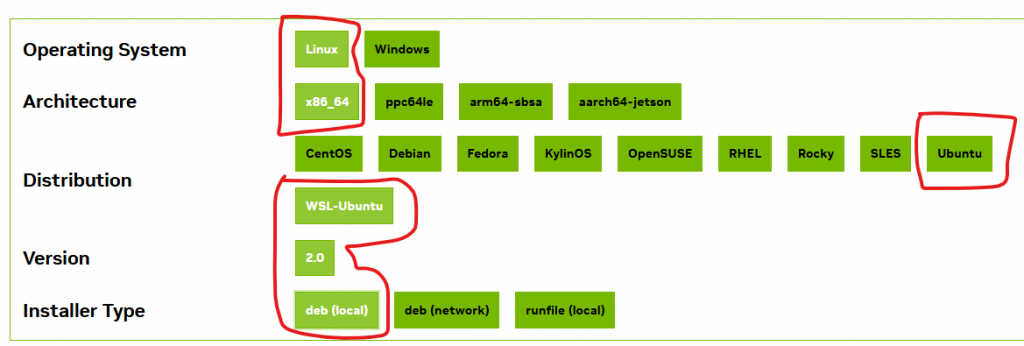
According to your CPU , choose right package :
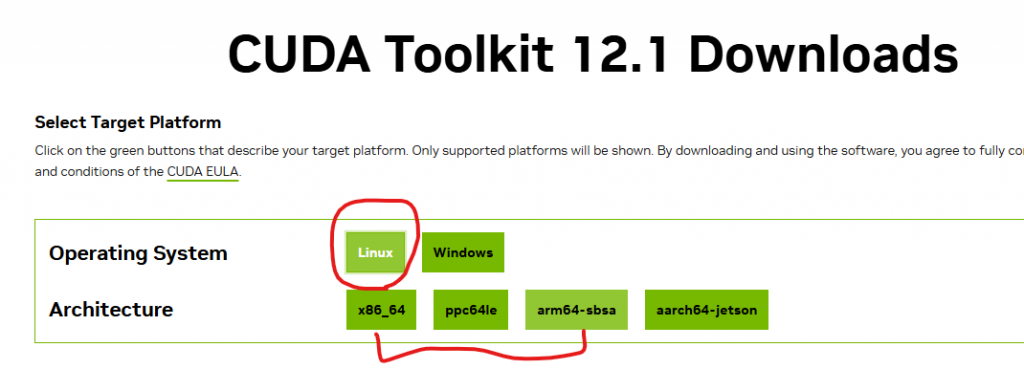
Because we gonna establish environment in a Ubuntu22.04 docker on Windows 10 system , so it should WSL .
Nvidia prepare installation comman for you :
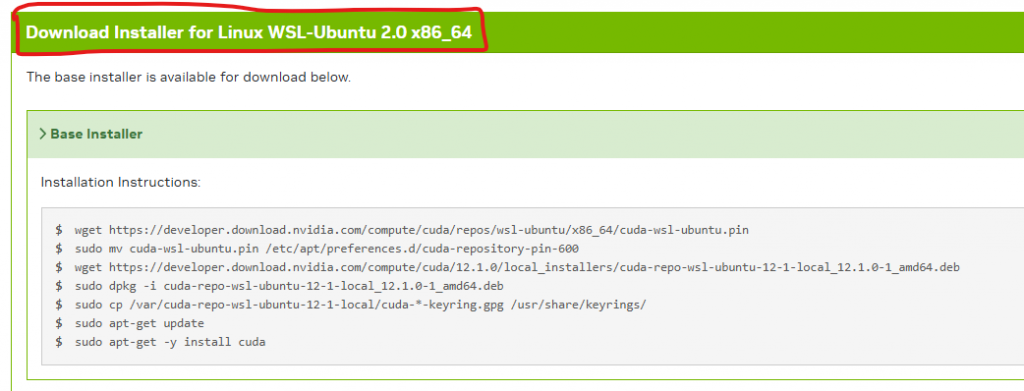
Now , let’s try if this works in Dockerfile ,now our Dockerfile is:
(by default docker container runs as root user
remove the sudo from Dockerfile)
FROM ubuntu:22.04
RUN apt update
RUN apt-get install -y wget #install wget lib
#install CUDA
#we try all command seperated first(not \ && combind them all) to clarify which command occur problem
RUN wget https://developer.download.nvidia.com/compute/cuda/repos/wsl-ubuntu/x86_64/cuda-wsl-ubuntu.pin
RUN mv cuda-wsl-ubuntu.pin /etc/apt/preferences.d/cuda-repository-pin-600
RUN wget https://developer.download.nvidia.com/compute/cuda/12.1.0/local_installers/cuda-repo-wsl-ubuntu-12-1-local_12.1.0-1_amd64.deb
RUN sudo dpkg -i cuda-repo-wsl-ubuntu-12-1-local_12.1.0-1_amd64.deb
RUN cp /var/cuda-repo-wsl-ubuntu-12-1-local/cuda-*-keyring.gpg /usr/share/keyrings/
RUN apt-get update
RUN apt-get -y install cuda
builded successfully !
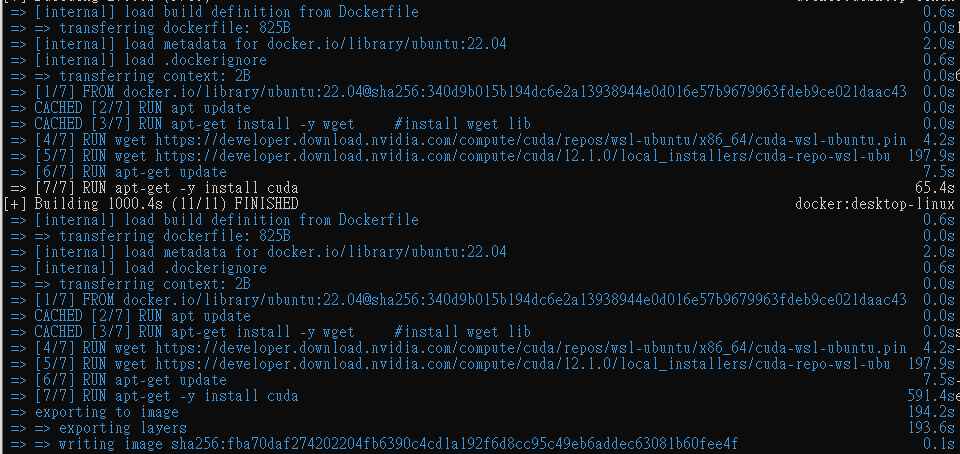
Wow , it’s really huge : 14GB

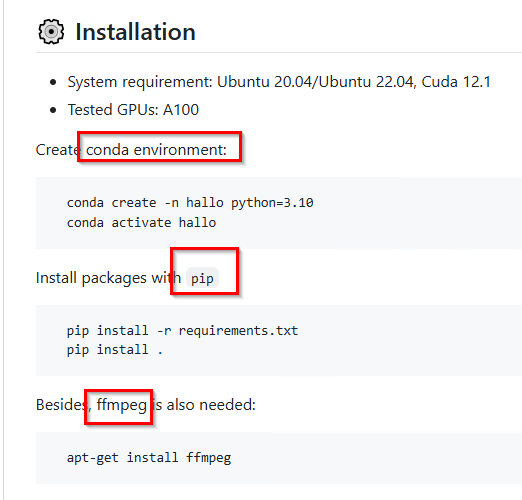
Now , it’s hallo project part
Install conda , in Dockerfile add :
#Install miniconda
ENV CONDA_DIR /opt/conda
RUN wget --quiet https://repo.anaconda.com/miniconda/Miniconda3-latest-Linux-x86_64.sh -O ~/miniconda.sh && \
/bin/bash ~/miniconda.sh -b -p /opt/conda
#Put conda in path so we can use conda activate
ENV PATH=$CONDA_DIR/bin:$PATH
build image to verify .
add
RUN conda create -n hallo python=3.10 \
&& conda activate hallo
into Dockerfile , try build again to verify .